
"So Merlyn sent you to me," said the badger, "to finish your education. Well, I can only teach you two things -- to dig, and love your home. These are the true end of philosophy."
- T.H. White, The Sword in the Stone
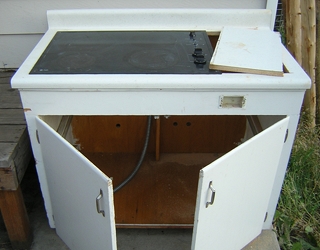 Houseblog: Compost Cabinet - 12 December 2011 - This is a project I did mostly in September and only now got around to making a post. In the first photo you can see the stove cabinet that I hauled out of the kitchen. Previous owners moved the oven to another place and made this thing to hold up the stovetop. It was shrinking the kitchen too much, so I removed it to replace it with something else that I'm still working on. But it occurred to me that this would make a good enclosure for compost. So I removed the stovetop, cut the rest of the top off, and then set them temporarily back on top for the photo.
 If you use wood to hold compost, it will eventually rot. I used several tricks to delay this. First I coated all the interior exposed wood with expired flax seed oil. Flax oil is the same as linseed oil, but because it's food grade, I can safely get it all over my hands. I decided to do two chambers, and on the bottom of each I put an extra piece of plywood. All the wood I used was scrap wood that came with the house. The rest of the interior framing is to hold hardware cloth to keep the compost away from the walls, and I drilled a bunch of holes to let some air in.
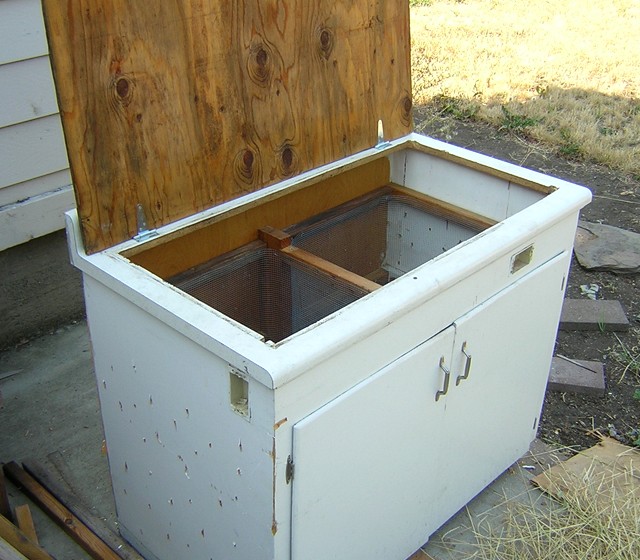 And here it is finished. Not shown are two more pieces of plywood to cover the front, behind the doors. They slide down from the top into notches, so to empty either side of the bin, I can just open the door and pull the gate up. One thing that did not go as expected: mice got in through the cracks around the hinges. I don't mind having mice in my compost, but this bin is for humanure, and I don't want them tracking it around. I eventually solved this by getting a cheap open-air bin for kitchen scraps. Another problem is that the whole thing is too small to hold even one person's poop (mixed with sawdust) until it's done composting. Not sure what I'm going to do about that, but at least it means there will be a lot of compost.
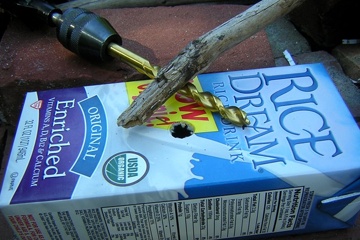 Landblog: Hut Roof Insulation -- 19 September 2011 -- I've done almost nothing on the land this year except this one little project, which was mostly done by Troy. The idea was to insulate the underside of the hut roof with a bunch of empty rice milk cartons. So, how do you attach cartons to the bottom of a piece of plywood? The normal way would be a bunch of toxic goop, but I wanted to do it with thumbtacks. This turned out to be difficult. Thumbtacks are made for cork board, not plywood. You need to drive the tack hard and straight. How can you do that from the inside of a carton?
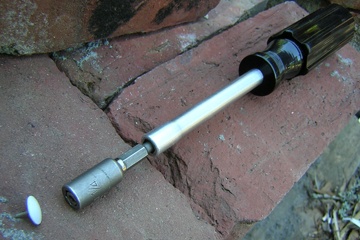 In the photo above you see step one. Using a 3/8 inch drill bit, which wasn't big enough, and then a stick to enlarge the hole, we made holes in a bunch of cartons. In this photo you see the tool for the next step: a hex driver with a magnetic hex driver bit stuck in it... and if you look closely, inside the magnetic hex hole is a coiled bit of thick steel wire, filed down to exactly fill the hole. This was necessary to bring the magnetism up to the tip to directly hold the thumbtack. Then it's just a matter of holding the carton on the roof, putting a tack on the end of the driver, fitting it through the hole, and using a mallet to pound the tack through the other side. Even with this tool, many of the tacks got bent instead of going in.
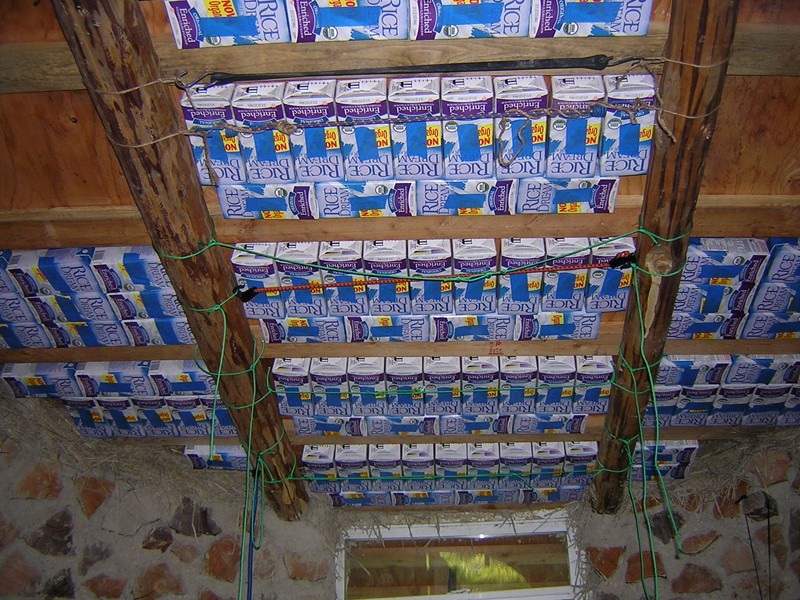 And here you see the project mostly done. The holes are covered with blue painters tape, and we also used that to cover the holes on the ends of the carton where the rice milk came out. At this point we ran out of cartons, and I still have a few more to drink. Those strings between the beams were added by Troy to hold the next layer of insulation, which hasn't been decided yet. If I can't find a cheap source of raw sheep wool, I might use thrift store blankets.
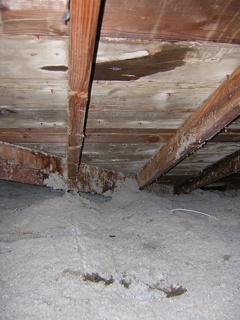 Houseblog: Roof Leak -- 6 September 2011 -- Last week we had the first big rainstorm since I took possession of the house. So I poked my head in the attic to see if there were any leaks in the roof, and saw this. You can see there's a wet spot on the underside of the roof, and there was a slow drip down to another wet spot in the insulation. (It's cellulose, not asbestos.) I put a pan under it and the next day I climbed on the roof. When I couldn't find any obvious holes, I climbed back down, went back in the house, climbed back to the attic, and used my hands and arms to carefully measure the location of the leak, using a roof vent as reference. It might have been a span over and three cubits down.
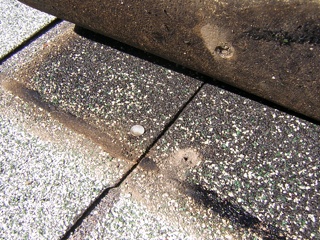 Then I went back on the roof and found a dimple on one of the shingles. Underneath I found this. Apparently one of the nails worked itself loose and fell out, and on the way it made a tiny hole in the shingle above it, conveniently matching the hole below.
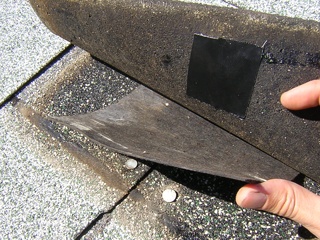 And here's how I fixed it. In a pile of house scraps, I found another roofing nail that had a rubber washer under the head, and pounded it in the hole. Then I duct taped the bottom of the shingle, and just to be extra safe, I stuck in a piece of tar paper.
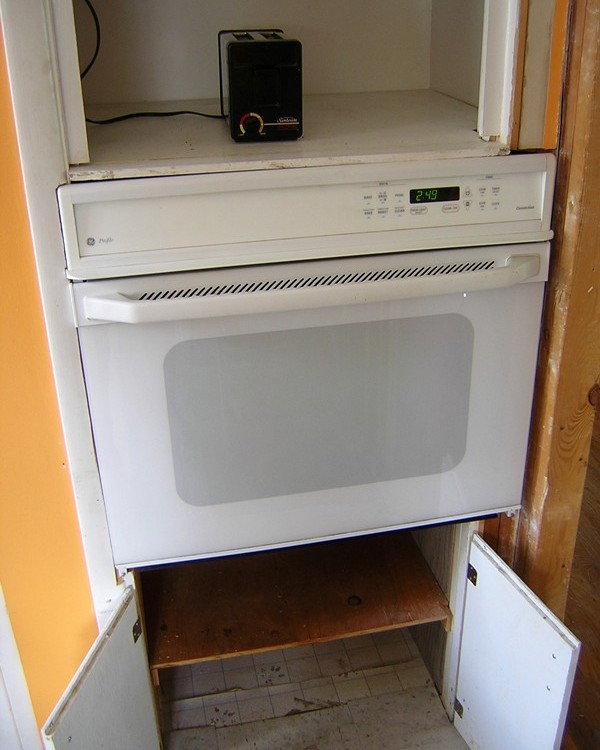 This is the new oven, all installed. You can see that I had to cut away some of the frame to get it in there. Also I had to do some work under it. The old oven was resting on two 2x4's, on a thin piece of plywood, which was unsupported at one corner! Ten inches below this was a shelf made of a thicker piece of plywood. I removed the 2x4's to create enough vertical room for the larger oven, switched the two pieces of plywood so the stronger one supported the oven, did some sawing to make both shelves fit, and nailed in some scrap wood to support them better.
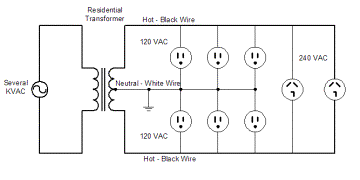 Did you ever wonder how the same circuit can have both 120 volt and 240 volt outlets? You can't get 240v by just putting two 120v wires in parallel, because that would add current but keep voltage the same. The way it really works is tricky, and I found this great image at the Radio Ether Blog. A house has three main wires: one ground, one 120v AC, and another 120v AC that is 180 degrees out of phase from the first. So when one hot wire is at +120, the other is at -120, and vice versa. To get 120v, you put your device between either hot wire and ground, and to get 240v, you put it between one hot wire and the other! And the panel is set up so that a double-width breaker taps into both hot lines. Black is hot, white is "neutral", and bare copper is ground (the difference is complicated). And when you have two hot wires running together, one is black and the other is red.
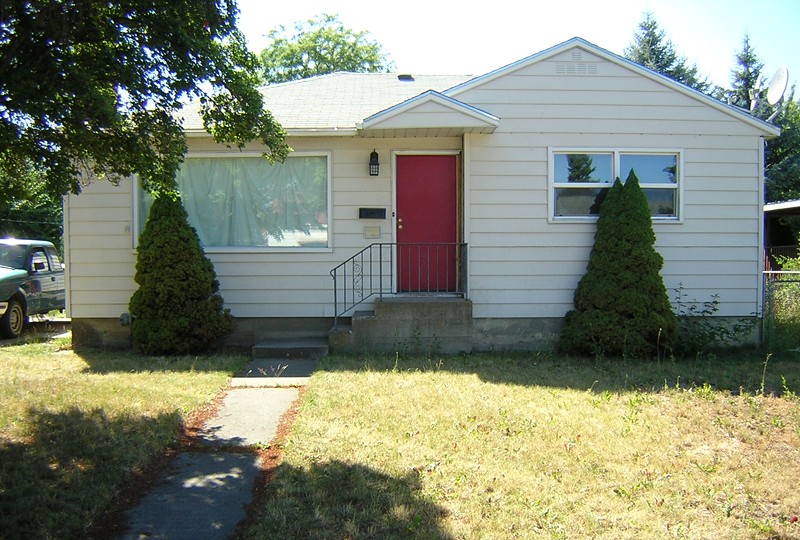 Welcome to the Houseblog -- 1 August 2011 -- Here's a photo of my house. This page explains why and how I bought it. It's in Spokane, Washington, built in 1951, around 1800 square feet counting the basement, on a 7000 square foot lot, half a mile from the river and two miles from downtown. My plan is live in it for a long time, and make it the house I want to live in. My philosophy is that there is no compromise between living value and resale value. Decide which one you're going for, and go all-out.
 This is Troy, a long-term visitor on the land who is also staying at the house some of the time. Up on the land he's helping with some projects that I'll write about later. One day at the house we tried to turn on the hot water heater for a shower, and it took us several hours to get the pilot light going. Finally, after pulling the whole mechanism out and taking it apart, I discovered that a bug had built a web inside the metal piece where the gas and air mix.
Landblog Archives:
September - October 2004
November - December 2004
January - March 2005
March - April 2005
May - July 2005
August 2005
September - October 2005
January - April 2006
May - June 2006
August 2006
September - November 2006
April - May 2007
June - September 2007
April - June 2008
July - November 2008
January - April 2009
May - June 2009
July - August 2009
September - November 2009
January - April 2010
May - July 2010
August - October 2010
October - November 2010
May - June 2011