
"So Merlyn sent you to me," said the badger, "to finish your education. Well, I can only teach you two things -- to dig, and love your home. These are the true end of philosophy."
- T.H. White, The Sword in the Stone
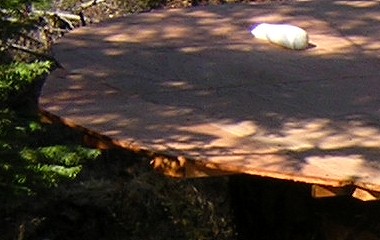 The Roof Part Two -- 7 November 2010 -- I've been grabbing every bit of dry weather to get this job done before winter. This photo is a detail of something I did on my previous quick trip, putting scrap plywood on the ends of the long boards that stick out on the sides of the structure. That white thing is one of my ghetto dehumidifiers: a sock filled with crystal cat litter. The pearls are better than the sharp-edged crystals, because they have less dust. The material is silica sand, the same thing they use for the tiny dehumidifiers in pill bottles. It sucks up moisture, and you can recharge it by sticking it in the oven at 240 degrees. Anyway, when I put the tarp on, I filled five socks and stapled them to the roof, to reduce condensation under the tarp. And on the latest trip, I took them off to put on the tar paper.
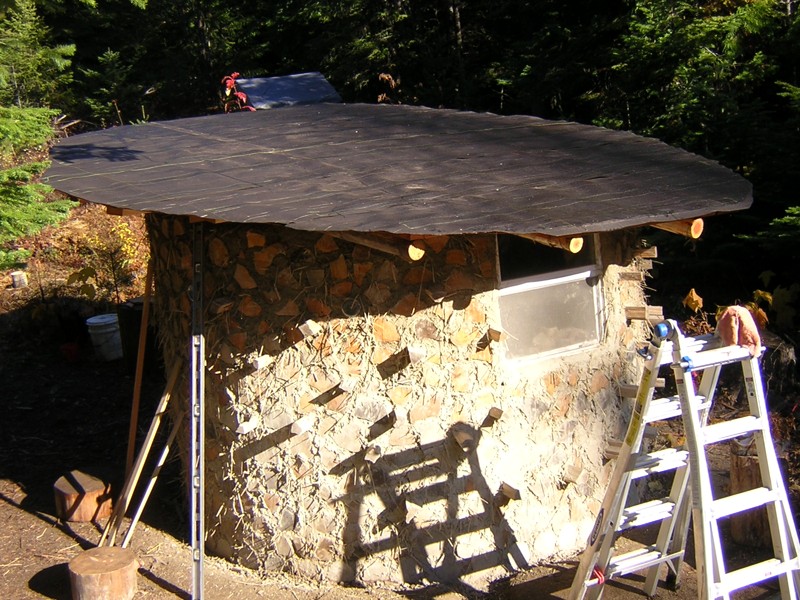 Roofing "felt" is actually thick paper saturated with asphalt. I'm using #30, also called 30-pound, which is the thicker kind. It comes in three foot wide rolls, so to cover 13½ feet from top to bottom, I used five courses, going side to side across the roof, with 3½ inch overlaps calculated to leave a few inches on the top and bottom. Here is a closer photo of the felt with lines that I drew to mark the locations of the boards under the plywood (in pale green) and the edges of the plywood (in orange, or if you're colorblind, they're the dim perpendicular lines). The white lines came already on the paper, to help lay it parallel. I was marking the boards so that when I put the roofing on, I would know where to put the screws to get them anchored in the boards for extra strength; and I was marking the edges of the plywood to help put the metal on straight, and also to avoid driving the roofing screws into the deeper screws holding the plywood to the boards. For the lines I used crayons, which are much cheaper than grease pencils and have the advantage of coming in many colors. To attach the tar paper, I used a staple hammer and 3/8 inch staples.
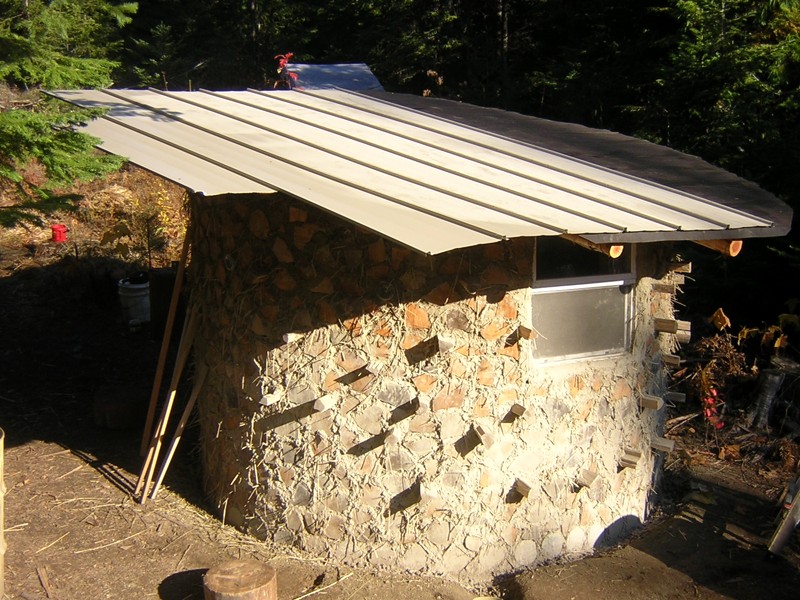 On Wednesday, after the sun steamed the dew off the tar paper, I started putting on the roofing, and here you can see where it stood on Thursday morning. This is a locally-made roofing product called Loc-Rib. It's a brilliant idea: the screws go on one edge of the panel, and then the rib of the next panel snaps down and covers them from the weather. I started on the left side of the roof, with the short panel, which I made by cutting one of the long panels in half. Then I worked my way across. At first I was using an awl with a mallet to pound holes in the metal, then a hand drill to make pilot holes for the screws, then a battery-powered drill to drive the screws. Later I figured out that I could have just made a tiny hole with the awl and driven the screws straight in, but then, that might have drained the batteries faster and forced me to finish by hand.
 And here it is all attached and trimmed. Thanks Sean for helping with sawing and drilling. Even Loc-Rib needs some exposed screws, and you can see them around the edges. The hidden screws are pancake head, and the exposed ones are painted to match the roof, and have rubber washers to keep the water out.
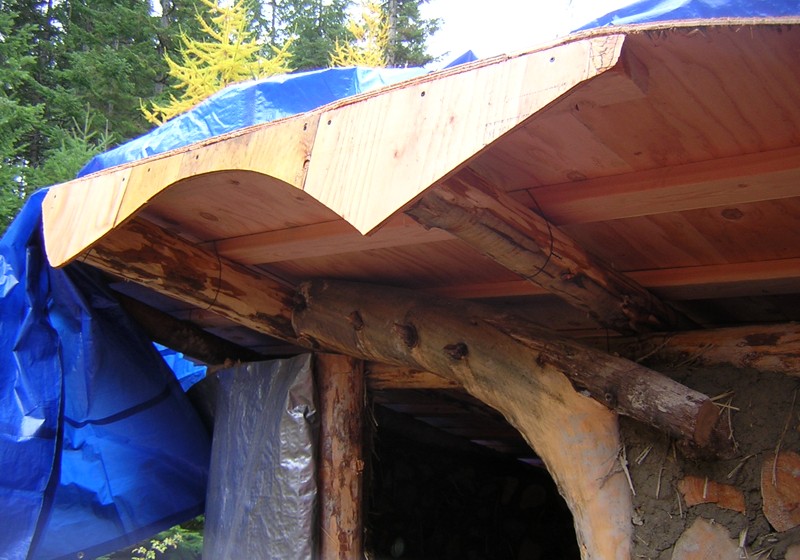 Building is Complicated -- 29 October 2010 -- This week it stopped raining for a day and I dashed up to finish putting plywood on the roof and rounding it off. Also I made this. I'm not sure what it's called, but the idea is that water hitting the edge of the roof structure on the high side will drizzle down into the building, so you have to make something like this to catch the water and drip it onto the ground.
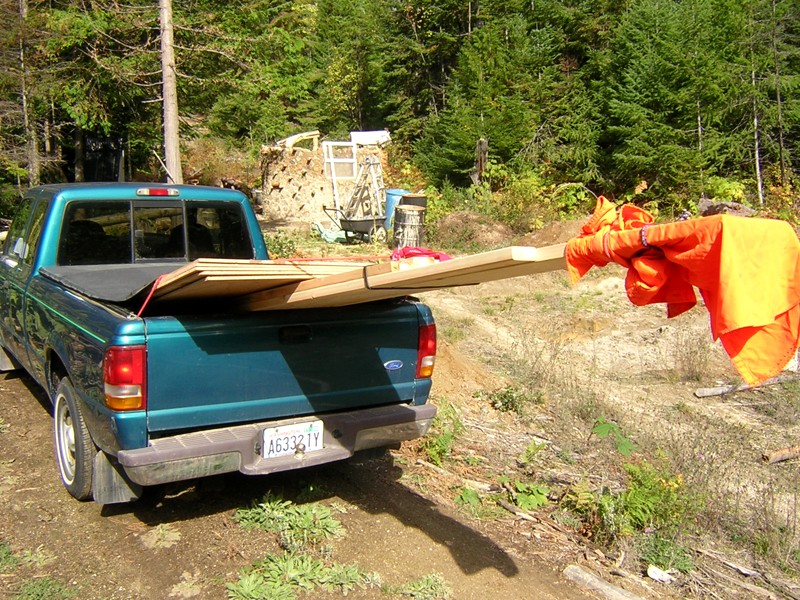 The Roof Part One -- 24 October 2010 -- When people talk about natural or low-budget building, they talk almost exclusively about the walls. This is because the roof is more complex than the walls, there are more ways to mess it up, the consequences of messing it up are worse, and it's damn hard to make a roof that's natural and low-budget. It's like, "oooo, you can build this wonderful hand-made house and oh yeah you'll have to shell out thousands of dollars for industrial materials to keep it from getting ruined in the first rainstorm."
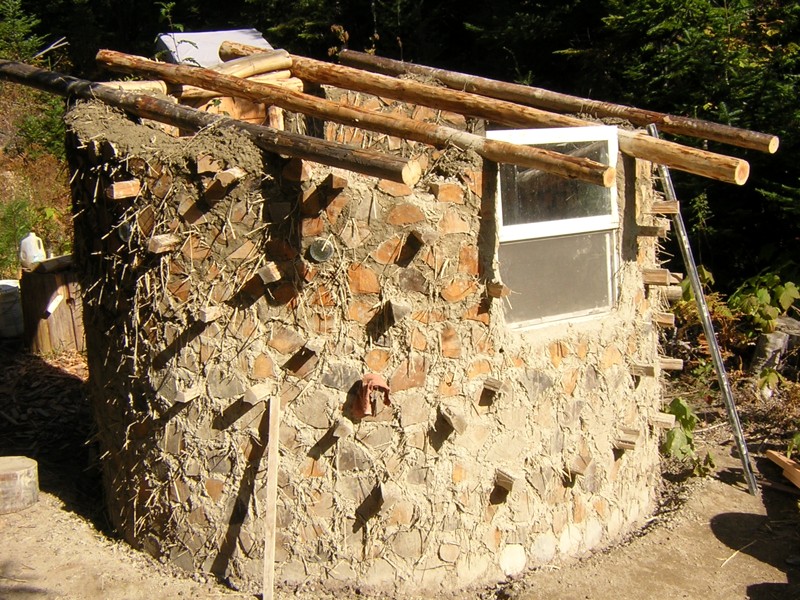 Before I knew what stuff to buy, I spent many hours doing sketches, and it's taken me years just to wrap my mind around roofing in general. But having done the mental work, the physical work is going faster than I expected. Here's the first layer, which I'm calling the beams. Since they slant downward, you could also call them "rafters". It was an ongoing project this summer to find four trees, living or dead, that were the right size and straight enough. The two center ones are fresh douglas-fir, I think the one on the right was standing dead on the north hill, and the one on the left was in a slash pile. I had the two center beams cobbed in and wired down on the previous Friday. On Monday I got the two edge beams placed and loosely cobbed in. Then came one of the tricky parts.
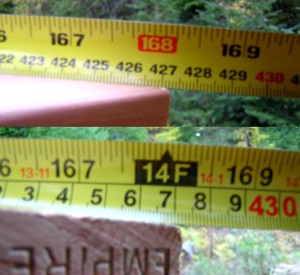 I did this by cutting the edge beams precisely to 132 inches, and placing boards across the ends, cut to 104 inches, making a rectangle. Then I pounded tiny nails into the top two corners, to hold the ends of two measuring tapes, and brought the tapes down in a big X to read them at the bottom corners. Then I kept sliding everything up and down and back and forth until the two cross-corner measurements were equal. Then I drilled holes and screwed the boards down, one corner at a time, continuing to measure and tap with a mallet. In this photo the screws have been placed, and you can see that the numbers are still a little off: one is 4272mm, and the other is nearly 4273mm. Seriously, that level of precision for this structure is ridiculous, but I was having fun!
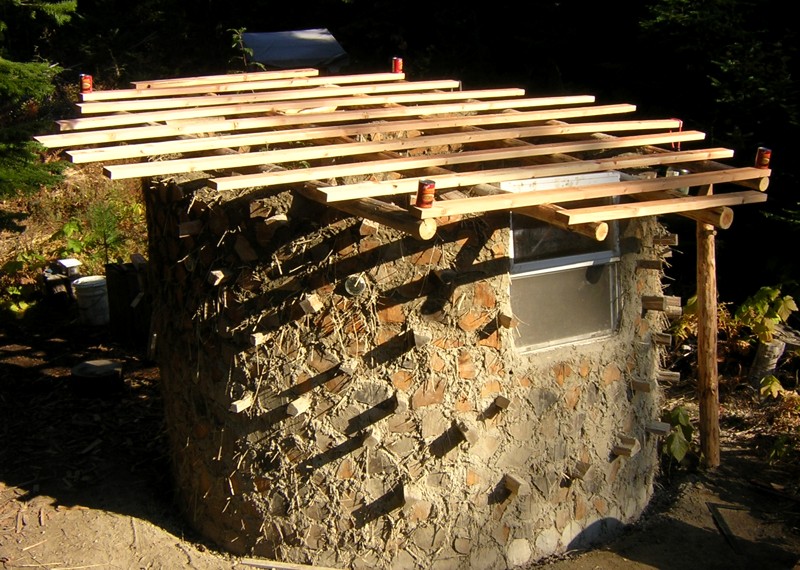 And here you see the second layer of the roof, done on Wednesday and photographed (as always) on the following morning when the light is good. The cans of Amy's Curried Lentil soup mark the corners of the square. (It was easier than photoshopping in four arrows.) So all the other boards could be placed by measuring up or down the slope from those two boards. You might also notice that the edge beam on the right is propped up. That's one of the little imperfections that crept in: that beam was a bit low so I was trying to raise it and pack more cob under it, but I never was able to raise it enough, so the boards had to be bent down to screw into it. These boards are 2x4's, which are actually 1½ by 3½ inches. Originally I was going to put them up on edge, at 24 inch intervals, but Charlie convinced me that it would be much easier, and almost as strong, to lay them flat at 16 inch intervals. Then I made a few final tweaks, moving one board up a bit to fit around the window, and most of the rest one inch toward the top when I decided that was a better fit for the roof.
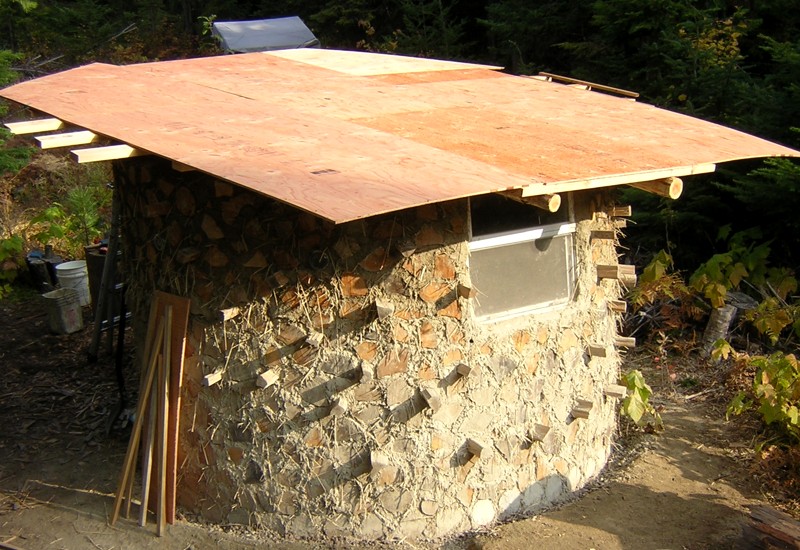 And here's the plywood over the boards, done on Thursday. At this stage the panels have been screwed down just enough to hold them in place. I decided to go with all screws, no nails, and I'm sure I didn't pick exactly the right kind of screws, but square drive screws are definitely better than phillips head screws, which were designed for machines, not humans. Also, I decided to go with plywood, not OSB. The cheapest plywood was almost double the price of the cheapest OSB, but it smelled like wood, where the OSB smelled like industrial chemicals.
 Lintel -- 16 October 2010 -- On this trip, using week-old cob that only needed some wetting and re-stomping, I built the walls around the door frame high enough to begin placing the roof beams. This photo shows something I've been thinking about, and when I got to this point, it became obvious. Mainly the lintel makes it much easier to place one of the beams. That piece of wood on top of the level is cut to the width of the window, which fits between the two center beams on the other side. So on this side, it marks the space between the beams, with one of them going to the right of the door frame, and the other going above the low side of the frame. Originally I was going to rest it on top of the sloping frame, which would raise two problems: how to hold it there, and how to get all the beams parallel and level, if one of them can't be moved side to side without also moving it up and down. The lintel solves both problems. Also it makes a platform to fill in the walls above the door.
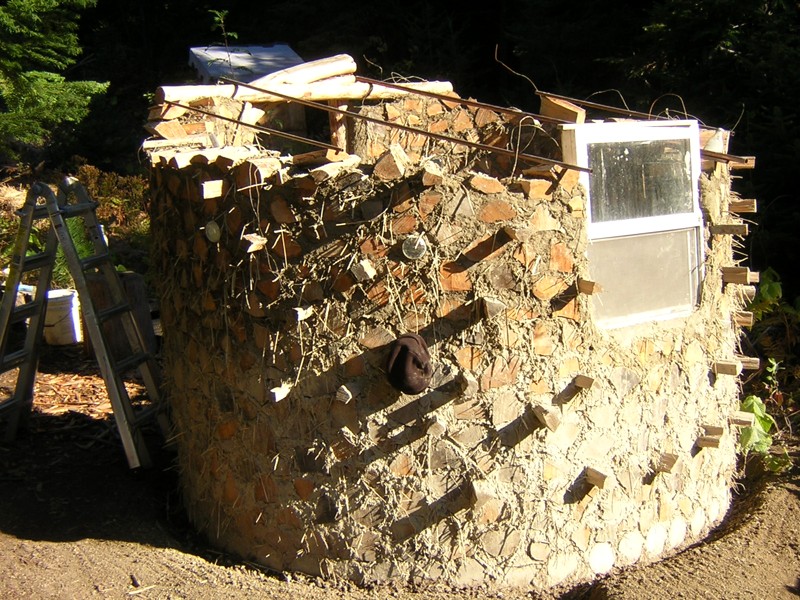 Here you see some beams parallel and level. I love this kind of work! These pipes mark the locations of the beams, and I spent more than an hour fiddling with them, measuring the distance between them and lining them all up with my eye, until I could see all four positions and know how high to build the cob and wood under them. Also notice the wires, which are wrapped around wood buried in cob and will be wrapped around the beams.
Archives:
September - October 2004
November - December 2004
January - March 2005
March - April 2005
May - July 2005
August 2005
September - October 2005
January - April 2006
May - June 2006
August 2006
September - November 2006
April - May 2007
June - September 2007
April - June 2008
July - November 2008
January - April 2009
May - June 2009
July - August 2009
September - November 2009
January - April 2010
May - July 2010
August - October 2010